The purpose of this article is to present a sampling of photographs with comments directly related to the rewiring of an automotive electrical system. This particular vehicle went through a rotisserie restoration, and after painting, is now ready for installing a new, better than original OEM, custom made wiring harness. Also, as an option on this project the gauges in the instrument cluster were professionally rebuilt and tested to OEM specifications.
This stage of the restoration process is critically important and requires careful forethought and planning. Research is essential when selecting a manufacturer of an automotive electrical system that replicates OEM or is custom designed for today’s popular computer controlled power-train, suspension and braking components. Our experienced staff will offer guidance and suggestions to assist with selecting the harness specifically designed for your particular project.
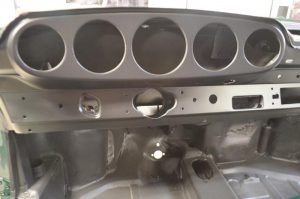
Picture #1 Instrument cluster now ready for installing rebuilt gauges and routing that portion of the harness to it.
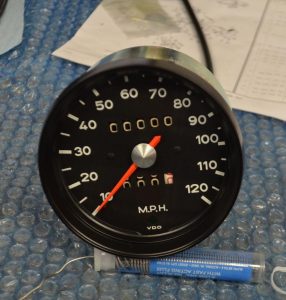
Picture #2 and #3 Speedometer gauge and others are aligned and tightened along with original ignition switch. All are now ready for electrical connections. The simplicity of this harness design enables ease of installation with all connections measured for fit and labeled accordingly.
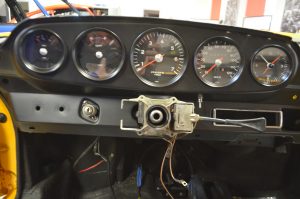
Picture #4 and #5 are before and after photographs of the installed wiring harness for gauges and other components. Wires were routed to their proper locations and,where necessary, through rubber bushings/grommets and secured with zip ties.
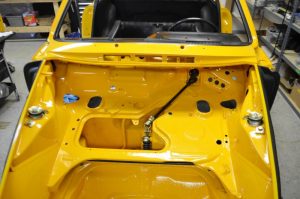

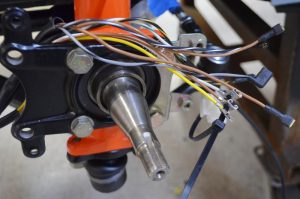
Picture #6 this picture depicts driver side wire assembly for head light, fog light and turn signals. Notice the thickness of the wires, color coding and fittings. Also, this photograph shows a glimpse of the new upgraded suspension components including wheel spindle and new hardware for this particular restoration project.
Picture #7 in this photograph the wire harness for the rear section of the car splits into several branches. Two of the branches are for the rear quarter panels that contain the rear light assemblies and another thicker branch with heavy duty connectors for electrical components essential to the operation of the vehicles engine.

In conclusion, the above is only a small representation of installing a new wiring harness. The routing of the harness, especially the many branches of it, requires patience, an understanding of electronics, proper tools and, most importantly, those skills essential to fully completing the task. The crew at Easton Muscle and Custom are highly experienced in this regard, and it’s their goal from start to finish to provide the best possible service and complete satisfaction.